Rare implementations: Koch Snowflake Tessellation

Over the past 5 years messing around with generative art, I've worked on a handful of rarely seen recursive patterns. In this post, I talk about my personal obsession: the Koch snowflake tessellation.
I call the Koch tessellation rare because there are few implementations of them online, and in most cases could not really make sense of the ones that I found. This may have changed over time, feel free to let me know if you have found ones that you like!
All of the code I wrote about is open sourced on Github and linked. Feel free to fork and play around with them.
Koch Snowflake, but make it tiled
It’s no secret that the Koch snowflake is my favorite fractal and one that got me into computer graphics to start with.
The idea of the Koch snowflake is simple. Take a curve that looks like this _/\_ and replace each straight edge with a smaller version of that curve. Put three of these curves together and you get a snowflake.
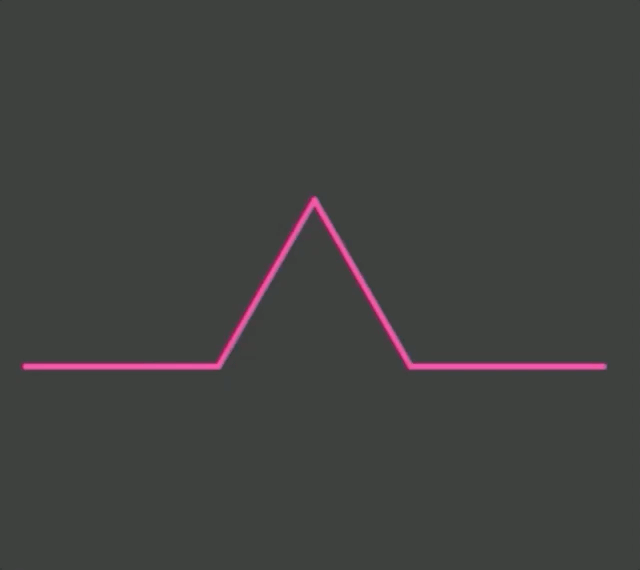
Animation of Koch snowflake recursion
I talk about it in my 2016 !!Con talk on L-Systems, another concept I’m fond of. There are also a lot of articles on the Koch snowflake out there so I’m not gonna do too much into it.
But did you know that the Koch snowflake shape (not just the curve) can be recursed upon? I found out about this from the Wikipedia page, but couldn’t really find any implementations in code.
We know that it’s not possible to do with only one size – you need two sizes of the snowflake. But which two sizes?
Approach 1: estimating from area
In 2015, I read somewhere that the smaller snowflake will have a third area of the larger one. I can’t find the source for this for the life of me, so you’ll just have to take my word for it 1.
With this information, I can use a formula approximating the surface area of a snowflake given its edge length to reverse engineer the length of a snowflake with a third of the area.
There are ways to estimate the surface area of a Koch snowflake2. But I was lazy and just went with the formula to find the area of an equilateral triangle.
Given the side length of an equilateral triangle, l, it’s area, A can be written as
A = sqrt(3) / 4 * l ^ 2
By that logic, l can be calculated as
l = sqrt(A * 4 / sqrt(3))
The exact implementation using this logic can be found here: source. It was implemented in Javascript to be rendered with Processing.js. Ignoring the specifics of using Processing.js, the bulk of the logic can be found in the Koch and KochTessellation classes.
The results were pretty satisfactory and by drawing these snowflakes with paths, I could get some pretty cool results by playing with the opacity of the strokes.
But I didn’t feel good about this was the fact that it wasn’t very accurate, given that I was using the area of an equilateral triangle to approximate that of a snowflake.
That said, the results were actually quite pleasing.
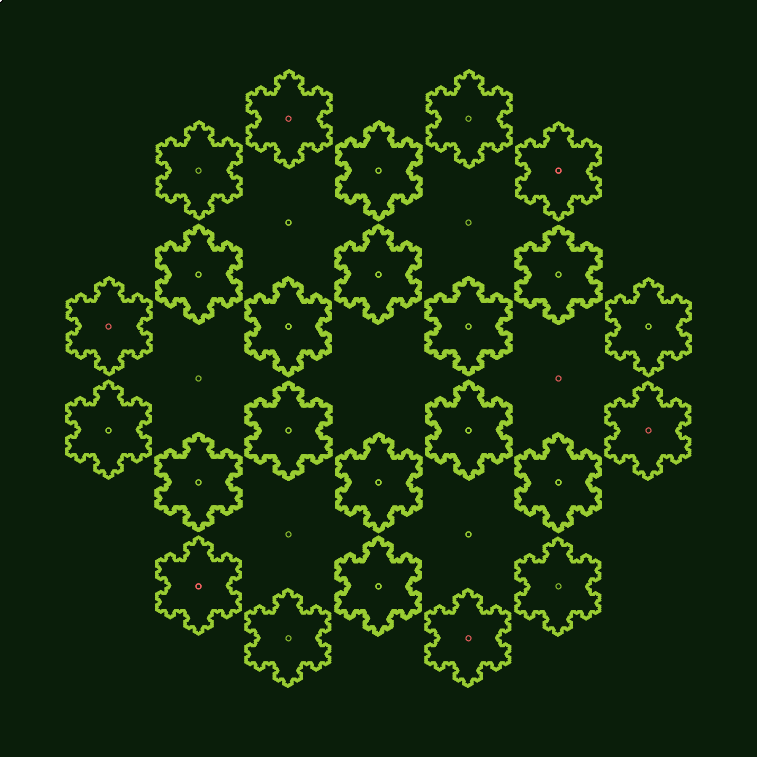
left: 2 iterations of tessellation. right: 3 iterations
4 iterations of tessellations. The little circles were there for debugging but I liked them so much that I just left them in.
Approach 2: actually read literature on the thing
Four years later in 2019 I decided to reimplement the Koch tessellation to create an SVG version so I could use a plotter to draw it.
You see, my hacky implementation has been haunting me all this while. I never really talked about that first implementation because I knew it was a hack. It was also really slow, and if you recursed too many times, it could cause the browser window to hang.
To start, I reimplemented the same approach, but the inaccuracy became very obvious, especially for SVGs, because you can really blow it up and see that the snowflakes were not flush to one another.
So I needed a different approach.
Going back to the Wikipedia article on the Koch snowflake, it cites a paper describing the tessellation 3. It describes various additive and subtractive ways to create the tessellation, but the most interesting part is
…using the two methods of construction shown above we can tile the plane with two sizes of tile, their diameters being in ratio sqrt(3):1
I honestly don’t know why I didn’t see this the first time, this would have made my job easier. I think I may have just been reluctant to create a JSTOR account to read it, I’m not sure.
But anyway, the construction methods described are for if you are using solid shapes, but I really wanted to draw this tiling as paths to achieve the same effect. If you know the two sizes of Koch snowflakes, all you need to do is place them in the right places. So I start out by finding the center the big middle snowflake, and surround it with 6 of the smaller ones. I technically did not have to render the big center snowflake because it will be ‘drawn’ by the edges of the surrounding snowflake.

Above, I just rendered 6 smaller snowflakes. The large one just appears in the negative space
You can see my implementation here. I built it on my own framework for rendering 4.
The part where the recursion happens is as follows below. I simplified the code for the purposes of this article as well as added comments.
/**
  * @param pos  object containing x and y coordinates of center of tessellation
  * @param radius {number} radius of center snowflake
  * @param depth {number} current depth of recursion
  * @param iters {number} depth of recursion for each snowflake
  * @param offsetRot {number} the offset rotation for this iteration
*/
function kochTessel(pos, radius, depth, iters, offsetRot){
 if (depth == 0) {
  // base case, just draw a snowflake
  kochSnowflake({
      center,
      // because of the way i drew my snowflake,
      // i needed the height of the snowflake
      radius: equiTriangleHeight(radius),
      offsetRot: offsetRot + Math.PI / 6,
      // how many iterations to recurse for this snowflake
      iters
  });
} else {
  // calculate the radius of the smaller snowflake
  // remember their diameters being in ratio sqrt(3):1
  const childRad = radius / Math.sqrt(3);

  // draw 6 smaller snowflakes
  for (let i = 0; i < 6; i++) {
      const theta = offsetRot + (i * Math.PI) / 3;

      // calculate position of this surrounding snowflake
      // like they are points on a circle that is the size
      // of the center snowflake
      const pos = translate(
          {
              x: radius * Math.sin(theta),
              y: radius * Math.cos(theta)
          },
          center
      );

      // recurse the smaller snowflake
      kochTessel2(
          pos,
          childRad,
          depth - 1,
          iters,
          // rotate the snowflake, notice that
          // it rotates as it goes around
          offsetRot + Math.PI / 6
      );
  }
}
It’s worth mentioning that there are two types of recursion happening here. One for the individual snowflakes themselves iters, and the other for the tessellation depth. There is also the idea of rotation with offsetRot, as you recurse down each smaller snowflake, it needs to know which direction it is oriented.
The problem with both these approaches is that you will end up with a bunch of overlapping snowflakes from adjacent centers, which is not performant and not ideal for plotter drawings. I added basic caching to avoid drawing snowflakes at the same position which sped up both rendering and plotting5.
With that, I finally could rest easy knowing that this implementation was proper.
Finished result
Here are some massive SVGs for your enjoyment:
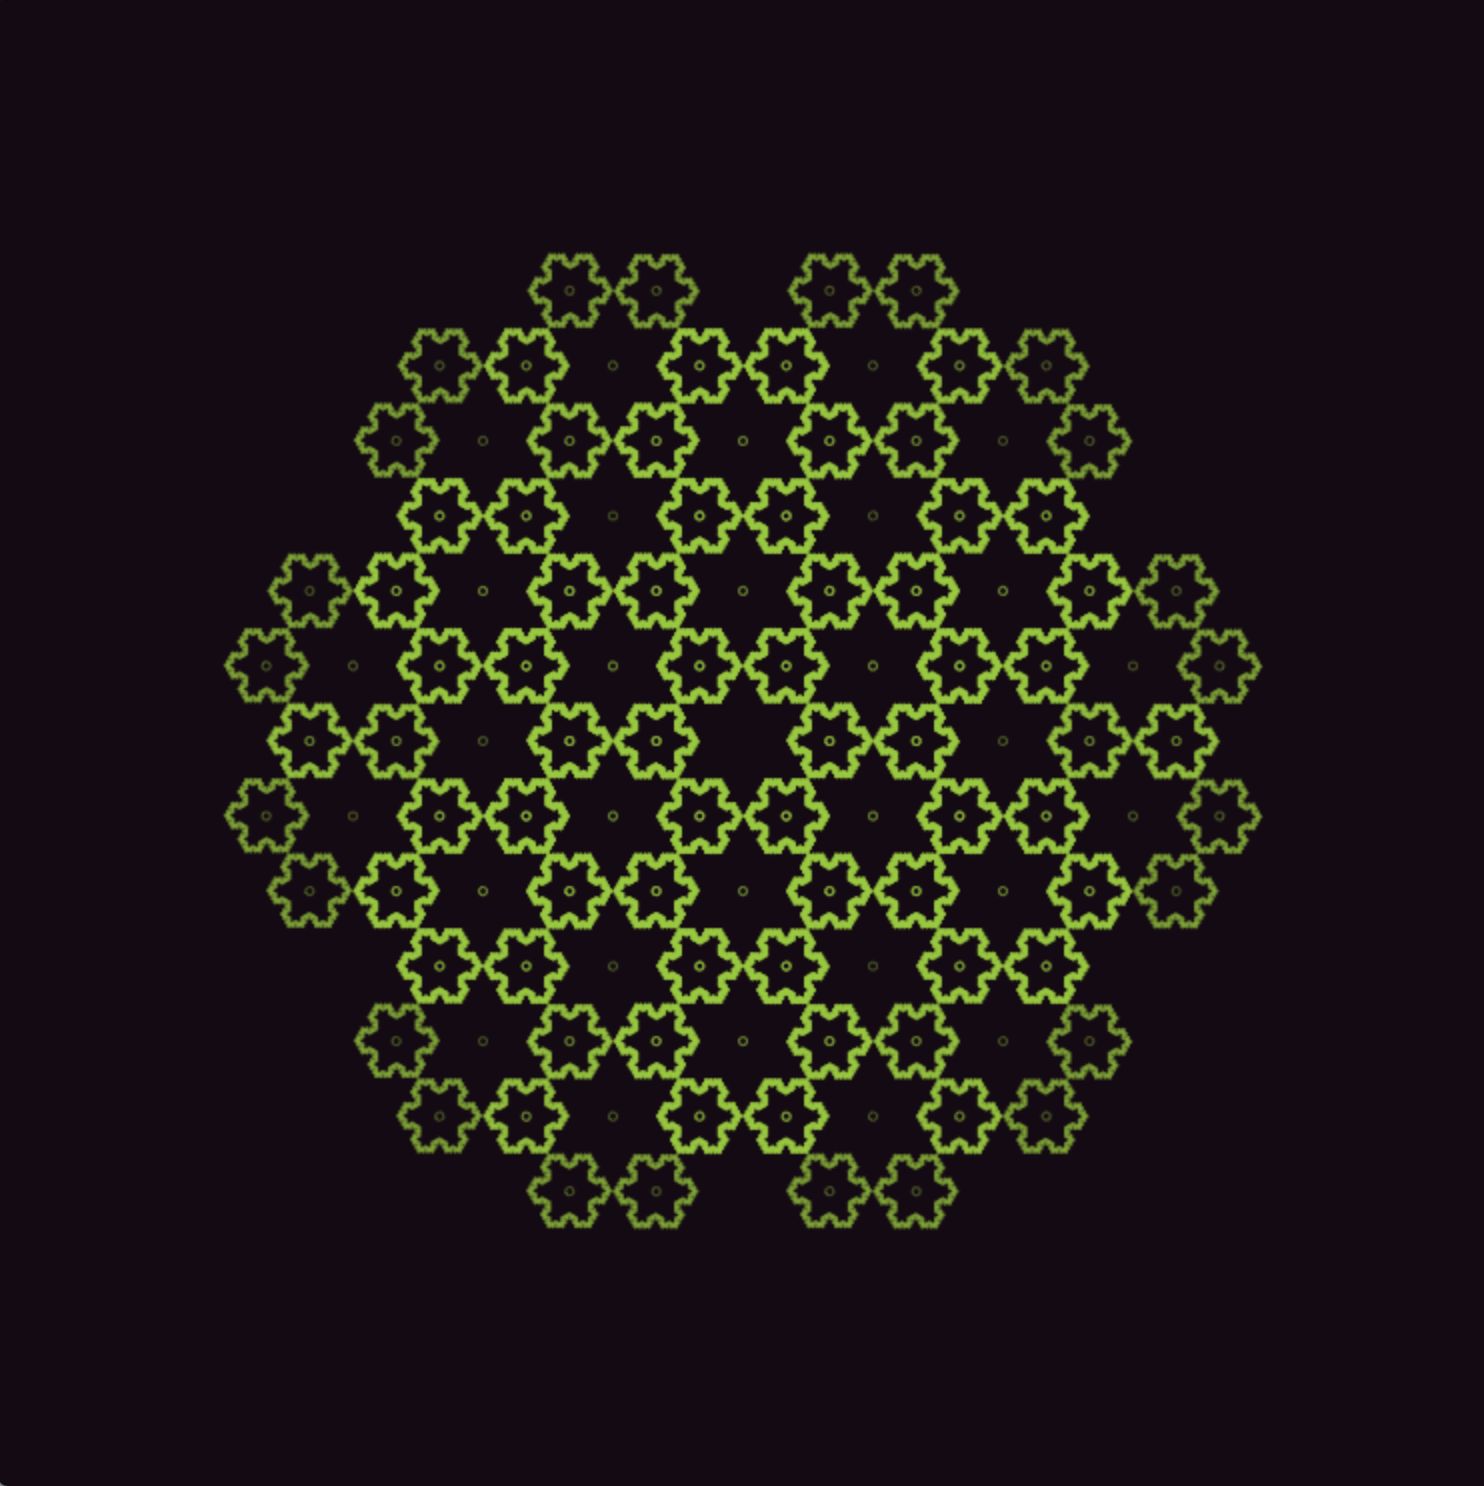
left: single iteration, right: 3 iterations


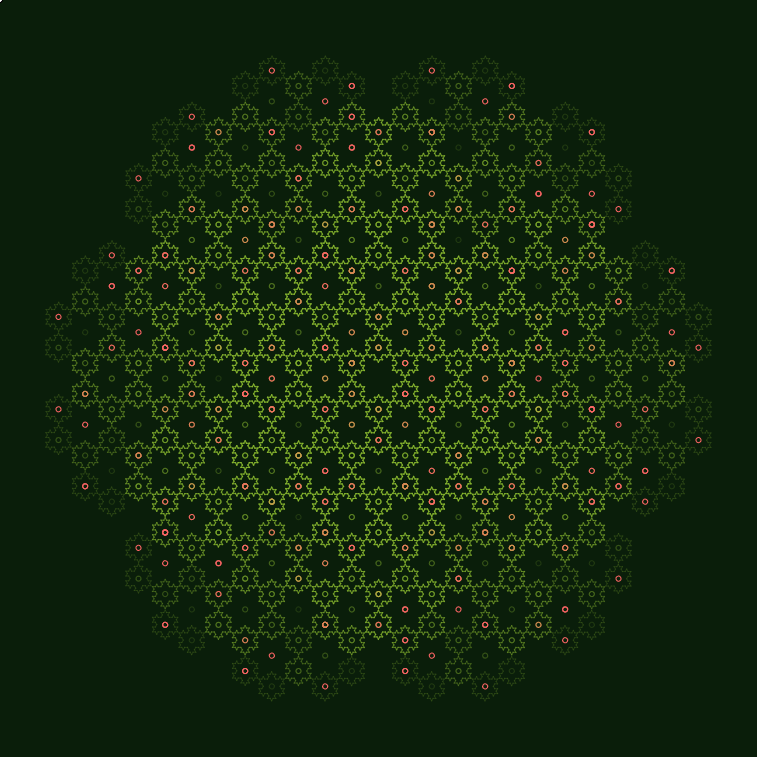
left: 3 iterations but with caching, i.e. no overlap, right: 4 iterations. It actually gets less interesting with higher iterations.
Feel free to use if you like. I only ask that you credit by linking back to this post.
#Inktober2019 day 13: this was supposed to be day 10 but it had a bug.
— piratefsh (@piratefsh) October 13, 2019
Two types of recursive tessellations of the Koch snowflake. Surprisingly hard to find implementations of online.
i love this tessellation.
code: https://t.co/aTsFqLXueX pic.twitter.com/RGp9cw87mO
As plotted on paper (left). The right one is a tesselation with 3 sizes, which I accidentally implemented and can be found in my source code.
Interactive UI
Update: I made an interactive UI so you can generate your own tessellations. The colors support any valid CSS colors. I wanted to use the native HTML color picker but it didn’t allow for setting opacity, which is key in enjoying the overlap version, if you ask me.
Anyway, this is part of a series sharing what I’ve learned about reverse engineering fractals. I’m working on the next post on Sierpinski’s curve.
Any comments, questions or corrections are welcome to me [at] piratefsh [dot] net. Just be nice and respectful.
-
Or write a proof! ↩
-
Here’s a good one: http://larryriddle.agnesscott.org/ifs/ksnow/area.htm ↩
-
Burns, A. (1994). 78.13 Fractal Tilings. The Mathematical Gazette, 78(482), 193-196. doi:10.2307/3618577. You can read the paper online for free but it requires $ for a download. Thanks JSTOR. ↩
-
It render in both p5.js and straight SVG, I’m very proud of it but ignore that, not relevant to the fractals. Many generative artists build their own tools to their liking. ↩
-
At unexpected times like these, concepts from my computer science education comes in handy. ↩